Let’s get those bookings rolling…
As an artist on gigVANA, you have 2 ways that venues can book you.
- By assigning you to a published gig Request that you’ve requested.
- By seeing and liking one of your “Styles”.
As the artist you are free to create as many styles as you need.
As an example, if you are a band leader and you have a 5-piece rock band, but you also have a duo acoustic act with just you and the singer, you can create a “Style” for each and be booked for both via the direct booking method.
At gigVANA, we won’t restrict your ability to be as successful as you are able to be. And best of all, you don’t pay anything until YOU GET PAID.

And away we gO!
Once you have registered and completed your profile by going to your settings and filling out the rest of your profile information you’re ready to create your first Style.
You’re probably wondering why we chose the word “Style”.
Well it’s the best description we could think of that conveys what an artist does for a performance. In this context it’s a band’s style but it could mean anything relating to any type of artist.
We needed something that could apply across artist’s… well… Styles.
Now let’s create a style
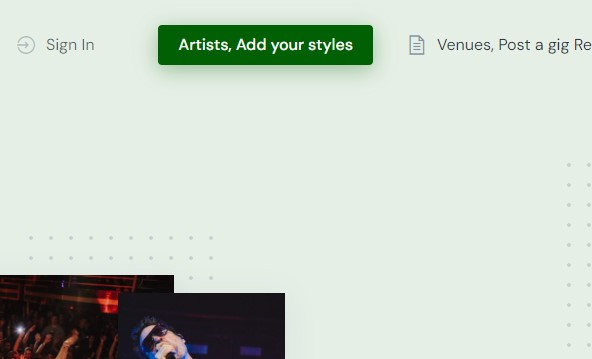
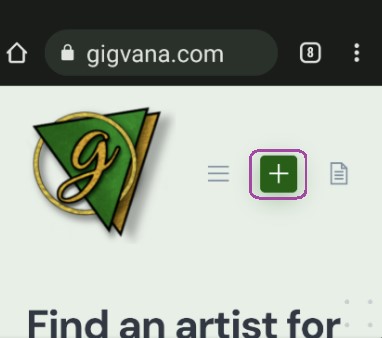
If you haven’t already noticed, we have the “Create Style” button all over the home page.
This one is in the upper right of your screen (on a PC) or the green button with a “+”.
Either way, these buttons as well as others on the home page will get you to where you need to be.
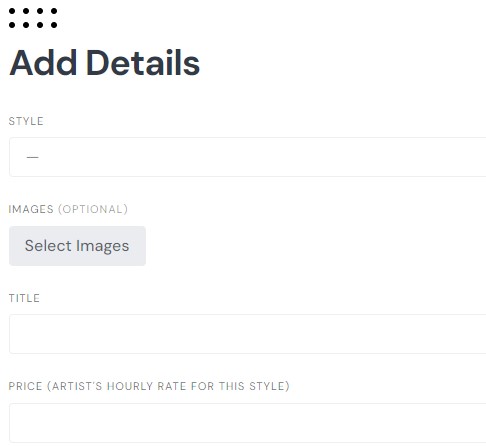
Picture, Style Title, Per Set Rate
In the first section of the Style details we have style, title, images and price.
- Pictures
- Choose a picture or 2 showing off your good looks, amazing talent and magnetic appeal.
- Style Title
-
- In here we’ll enter the name of our group/act’s name, for example, if we’re a band, we’d enter “BandVana”. If you recall, we mentioned that as a registered user of gigVANA you can create as many “Styles” as you want. So if you are a part of a band, but also have a solo acoustic act, you could create that as a separate style under this user profile (if you’re the bandleader and the registered user of the band profile), if not, simply create a profile for yourself and then create a Style as a solo acoustic act, easy-peasy, lemon squeezy!
- Per Set Rate
- Now for the good part!!!
- Here, we ask you to put in the per set rate for your style. We know… most acts are not hired by the set but instead, by a full show rate. But trust us, you’ll understand why we did it this way by the time we finish completing our style.
- So, if you would normally charge $500.00 for a 4 hour show, then just divide $500.00 by 4 (sets) to get a pert set rate of $125.00. Adjust your typical pay for your typical duration of show.
Location, # of Sets, Tags, Description & Set Duration
- Location
- Pretty simple… begin typing your address, city and state and our cool locator engine will find you so that hopefully you don’t have to type out your full address… you can also leave it just to city and state if you want. We leave that up to you.
- # of Sets Required to Book this Style
- Indicate here, to the venue how many sets are required to book this style in order to equal full pay for a full show.
- Tags
- Since tags are searchable on our site you can choose from any existing tags or create additional tags if you need to.
- Description
- Now it’s time to get detailed. Go into as much detail as you wish here.
- You can even put video links here from youtube and those videos will play right in the description pane of the page, pretty cool huh?
- Set Duration – In Minutes
- Enter the duration of your sets here, in minutes. The max value that can be entered here is “55”.

Account Settings
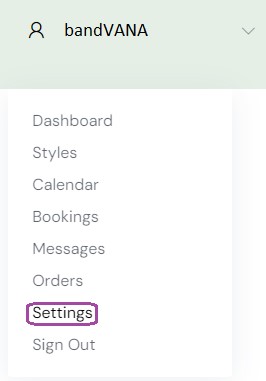
Now we need to move to the account settings area.
To get there we just need to hover over our user name in the menu (if on a PC) or click on the hamburger menu, click your user name and click “settings”.
This will bring you to the rest of the settings.
From there you’ll need to scroll down to Booking Offset…
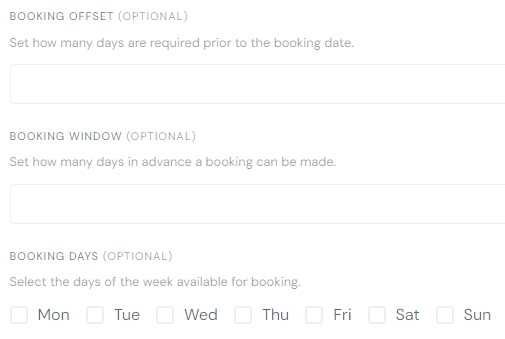
Bookings Offset, Window & Days
Now lets get into how we want our schedule to look to venues.
- Booking Offset
- Set this value to the earliest quantity of days from the day a venue is looking at your style to the day you want them to request booking you.
- For example, if today is Thursday and you only perform on weekends, and you don’t want a venue that is looking at your style today to book you for the upcoming Saturday (2 days away), then this value should be more than 2. If you’re OK with being booked on a Monday for the upcoming Saturday then this value should be 6. It is optional, so if you don’t care, you can also leave it blank.
- Booking Window
- This value should be set to how far out you want venues to be able to book you. Leave it blank if you want to be able to take bookings as far out as you want.
- Booking Days
- This one is easy to set but may be a bit of a struggle to agree upon amongst your fellow performers ( 😉 ).
- Simply choose the days of the week that you are available for bookings or, leave them all unchecked to leave your availability completely open.
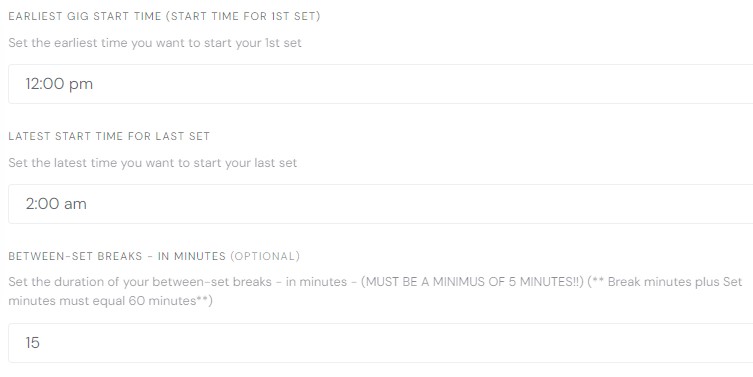
Earliest gig Start and Latest Last Set Start
This part is a little tricky but follow along and it should get clear as we go. Worry not, this, along with everything else will improve.
- Earliest gig Start Time
- This value should be set to the earliest start time that you are available to start your performance. Remember, 12:00PM is noon and 12:00AM is midnight.
- Latest Start Time for Last Set
- Now the tricky part. Set this value to the time you expect to start your last set. when your last break is included your show will end at the top of the hour
- Between-Set Break – In Minutes
- Set this value to the length of your breaks but to a value of no less than 5.
- In total, the total set duration (from Styles) and the Between-Set Break values, when combined should be equal to a value of “60”, or 1 hour.
- Setting these 2 values as we’ve instructed will allow venues to select multiple 1-hour time slots to the quantity/duration that you outline in your settings.
- and, in the event a venue tries to book your Style for more sets than you’ve outlined in your Style, you can message the venue or politely decline the booking. up to you.
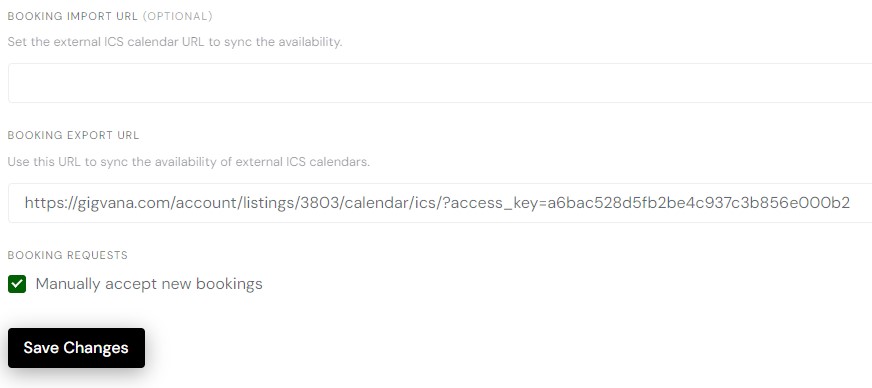
Booking Import, Export and Booking Requests
And finally, the last section.
- Booking Import URL
- Here you can set the external ICS calendar URL to sync your availability.
- Booking Export URL
- Use this URL to sync the availability of your external ICS or google calendar.
- If you want the Google Calendar to fetch and display booked dates, please copy the listing Booking Export URL, and follow the “Use a link to add the public calendar” instructions here Subscribe to someone’s Google Calendar – Computer – Google Calendar Help
- Manual Booking Acceptance
- To manually accept bookings check this box. Which is a good idea so that you can screen your booking requests to make sure of no scheduling conflicts
Stripe Payment Gateway
The last thing you’ll have to do as an artist to get your Style active is to add your bank information to the Stripe Payment Gateway.
This is how you’ll be paid by gigVANA!!
You can either enter a bank account or a debit card. Either way when venues approve your gig order and Stripe releases payment, you can easily log into your Stripe account and transfer the funds to the account you’ve set up here.
Oh.. and if you’re setting up more than 1 Style, you’ll only have to do this once. If you set up another user profile on gigVANA you’ll have to go through this again for each gigVANA profile. But only once per profile. After that, you won’t have to do it again for any Styles you add to those profiles.
Booking Requests
Now, when a venue see’s your Style, likes it and want’s to book you for this style, they’ll complete a booking request on their end and submit it for your acceptance.
Booking Requests appear in your Bookings page. You’ll receive an email notification of new bookings and see a badge, with a count of new bookings, when you login.

Booking Details
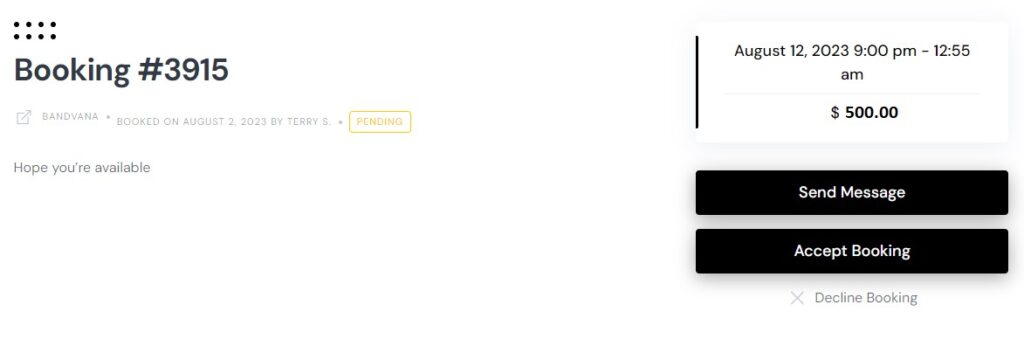
Simply click on the booking to go to the Booking Details.
The Booking Details will have:
- Date
- Location of Venue
- Name of Venue
- Time
- Pay
- An option to message the venue, in case you need more details to accept the booking.
- An option to “Accept Booking”.
- And an option to “Decline” the booking. If you choose to decline, you’ll be asked to provide a brief comment regarding the reason for declining the booking.
Booking Calendar
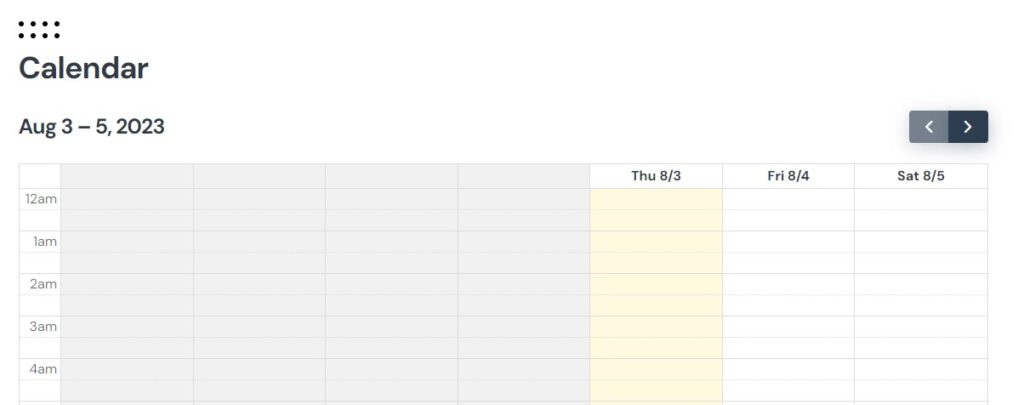
Once you “Accept” the booking it will appear on your calendar.
A couple of notes on the calendar.
- The calendar is Style specific. That is to say, each style has it’s own calendar. So, while each style will be protected from double-booking, if you have more than 1 style there is a risk of double-booking 2 (or more) styles for the same date.
- So a word of advice from gigVANA, please look at booked dates for all Styles before accepting a booking.
Your New Style’s QR Code
After you create a new Style, our site will automatically create a QR code that will be a scannable link directly to your new style.
There’s a “Download” button in each Style to click to download an image of the QR code to your mobile device to keep with you always. Just rename the image to match the name of the Style you’ve created and BOOM! Easy!!
This will be very handy when you are out visiting venues who are ready to book you directly.. simply bring out your phone with this code and have them scan the code or hand them a card with this code printed on it.
This code can be printed on Show posters as a booking link to bring anyone wanting to book you directly to your booking link such as:
- venues
- event planners
- individuals wanting to book for private events
- corporate events
- your imagination is your only limit
CRAZY EASY!!
